Datalayer Platform
Datalayer is available online as a Platform. This is the easiest and fastest way to register and access Datalayer functionalities.
Account
To login, go to the login page and login via GitHub.
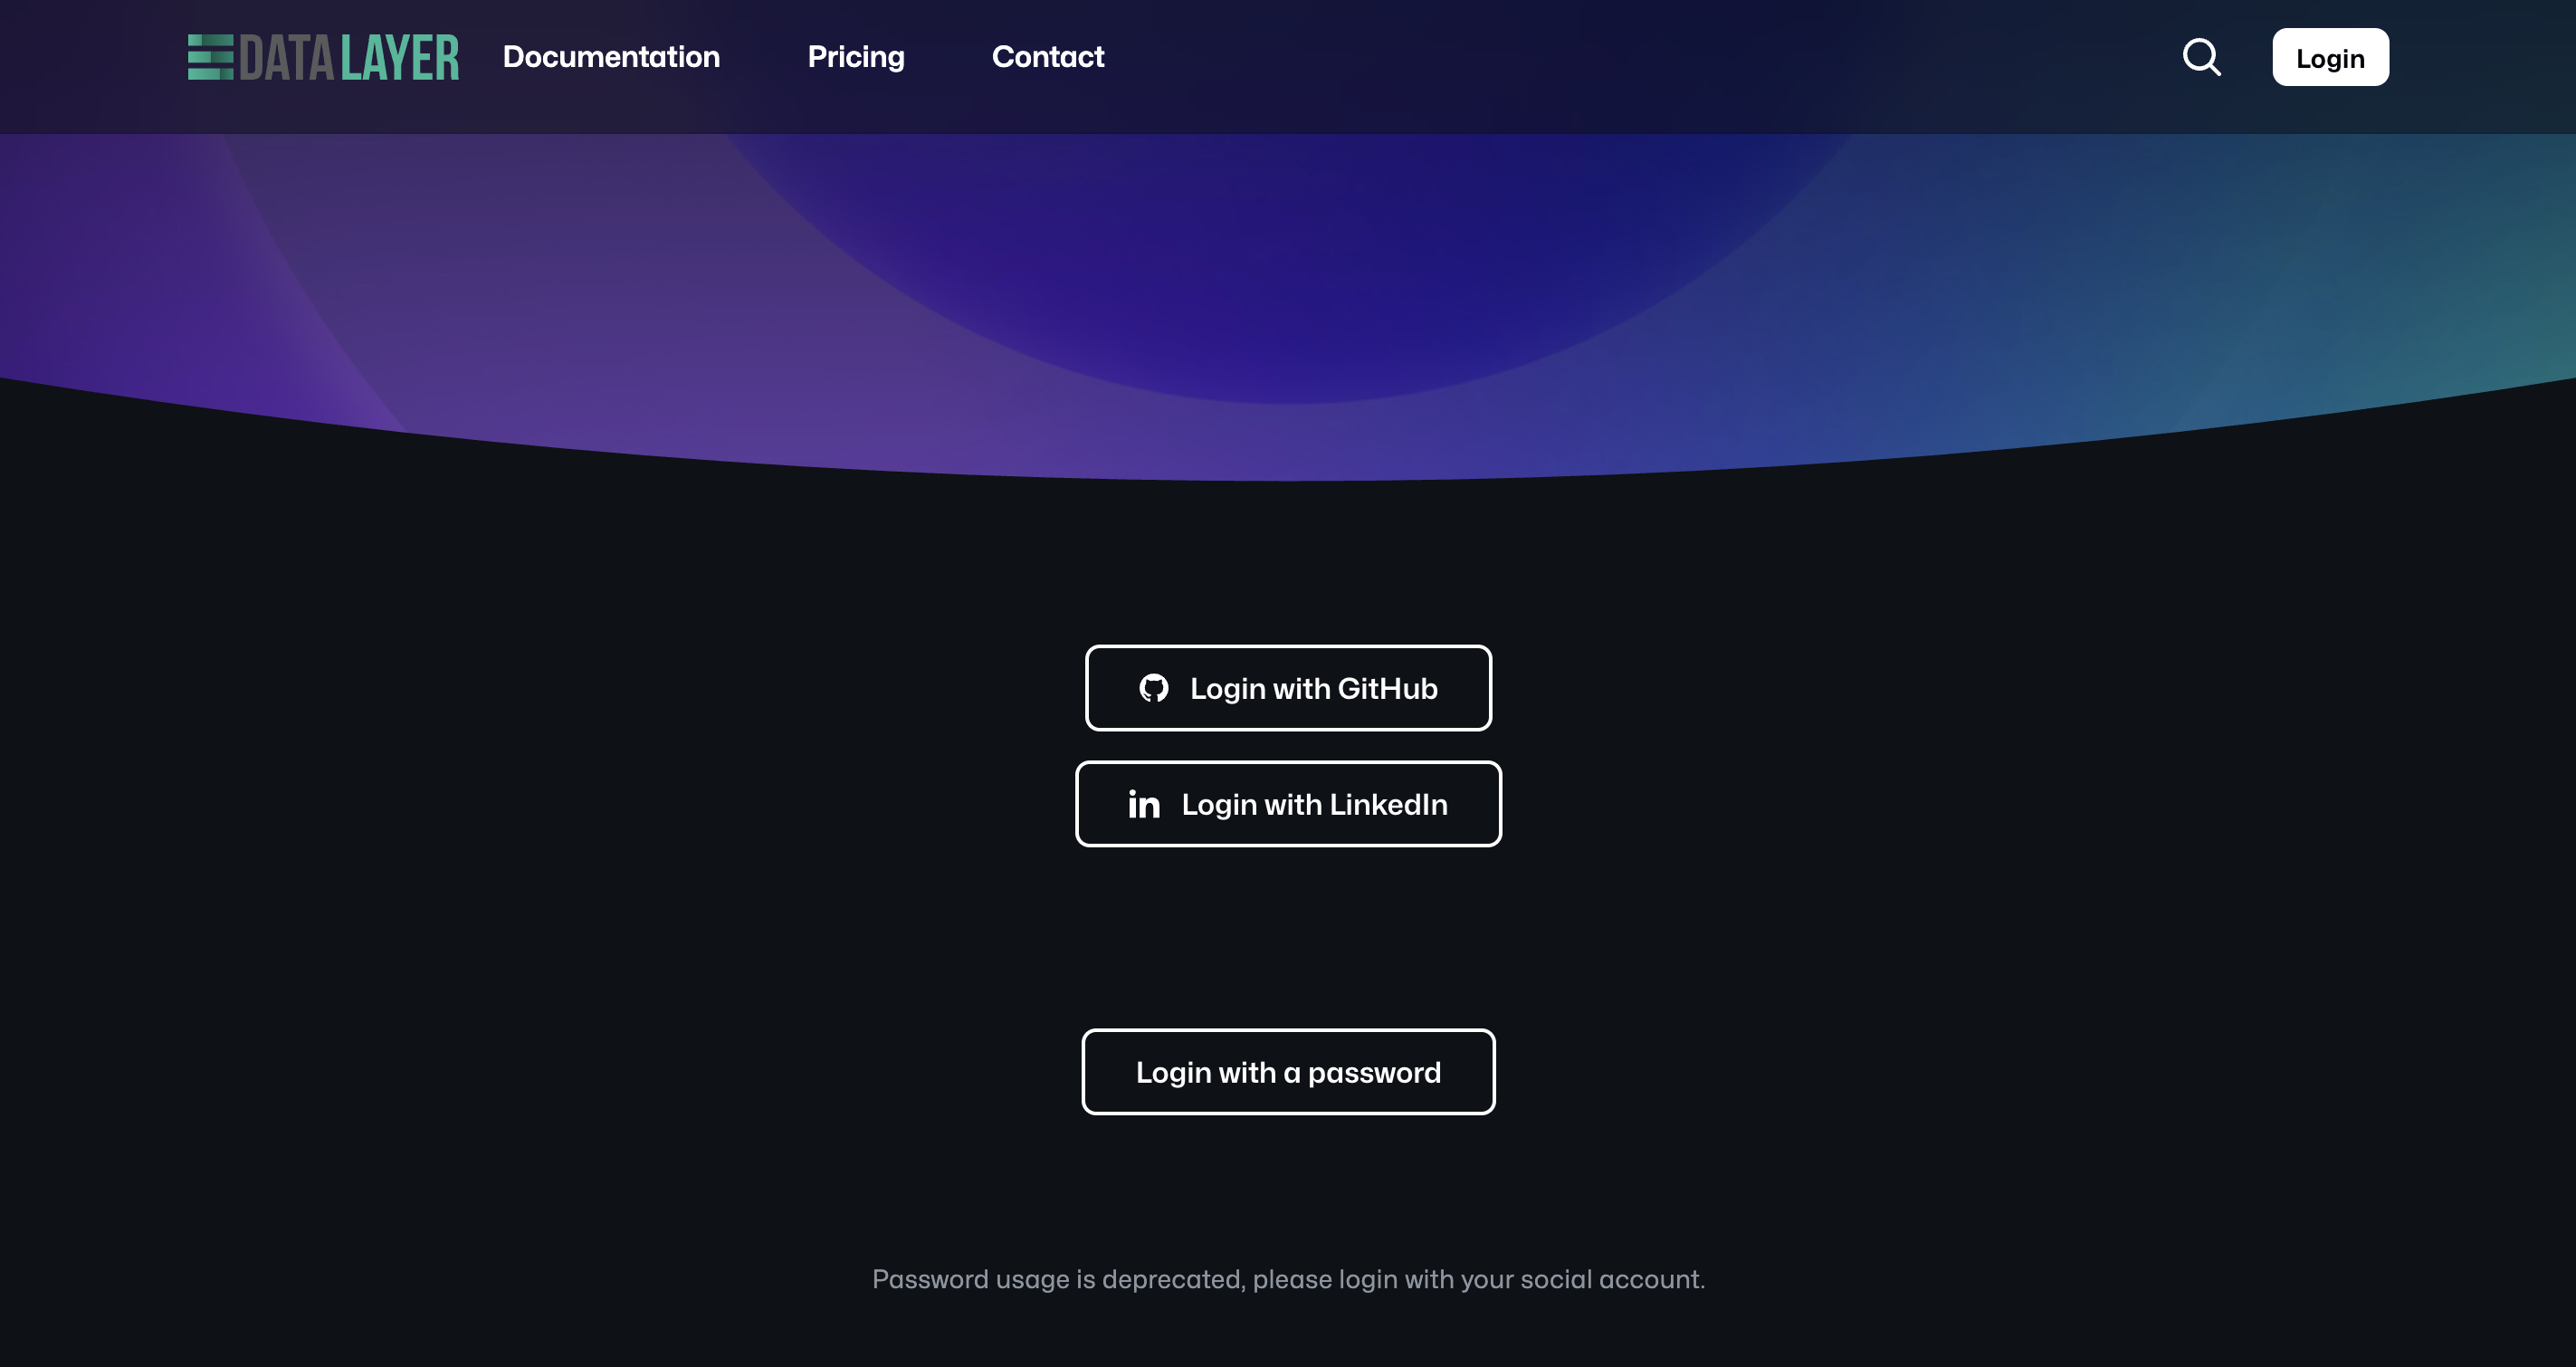
We have disabled the creation of new accounts via email and password for compliance reasons. Users with existing accounts can still login using your email and password.
You can also use IAM Tokens and authenticate via https://datalayer.app/login?token=True
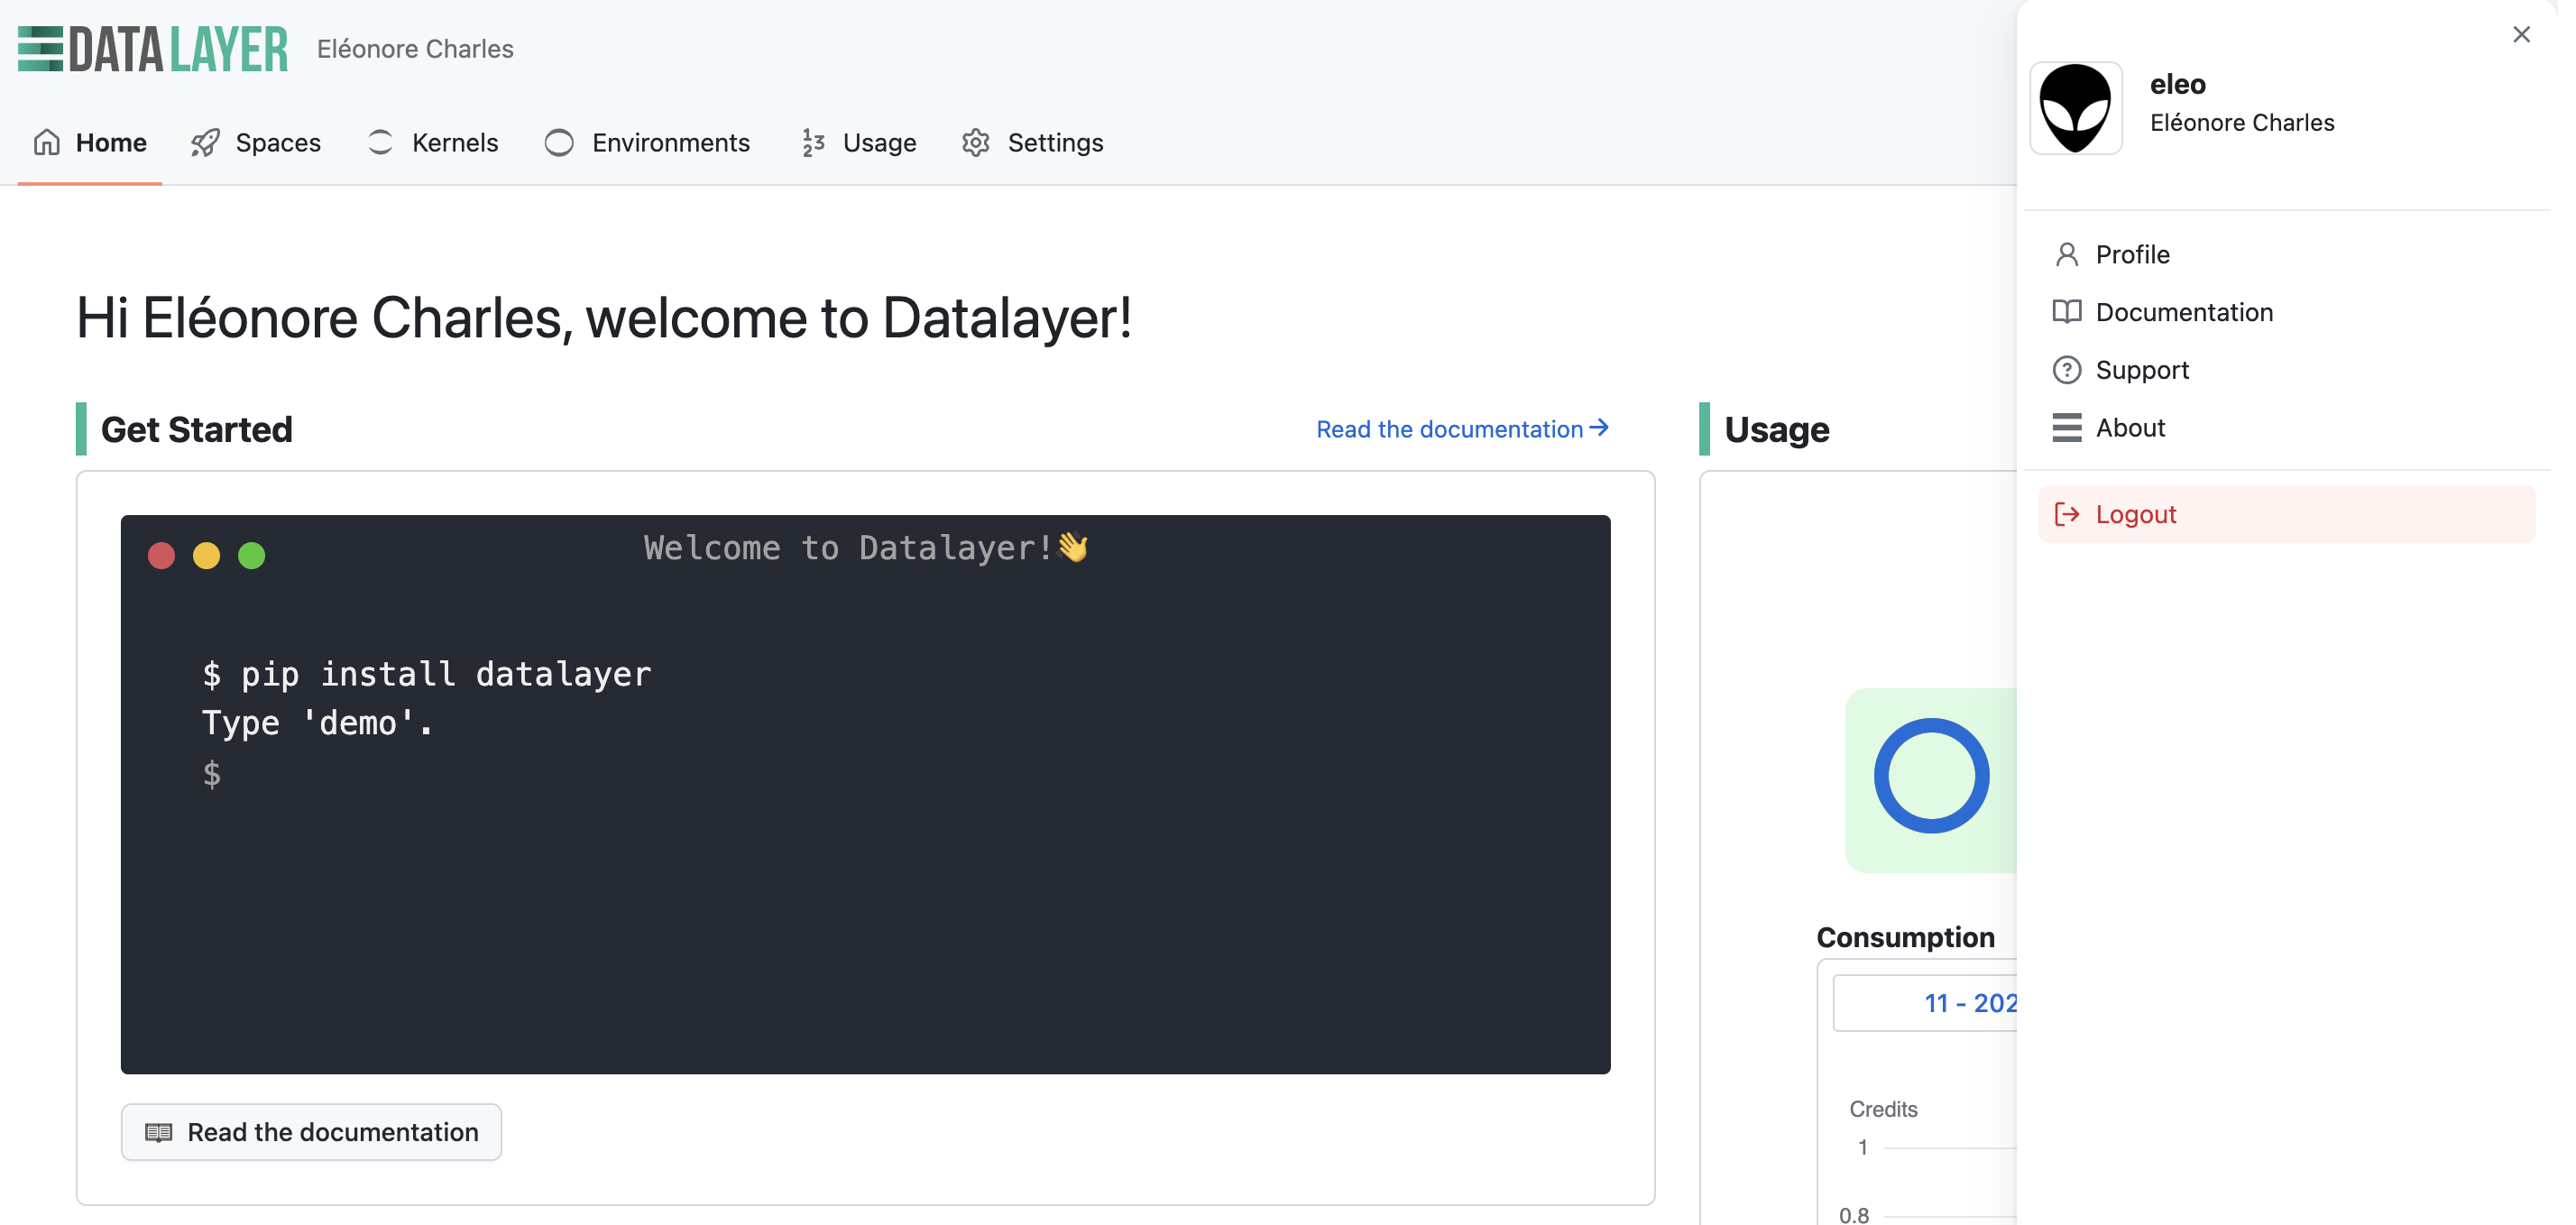
Once logged in, you can view your profile details in the Profile section under Settings.
You can link your Datalayer Account with your GitHub account.
You can logout at any time.
Runtimes
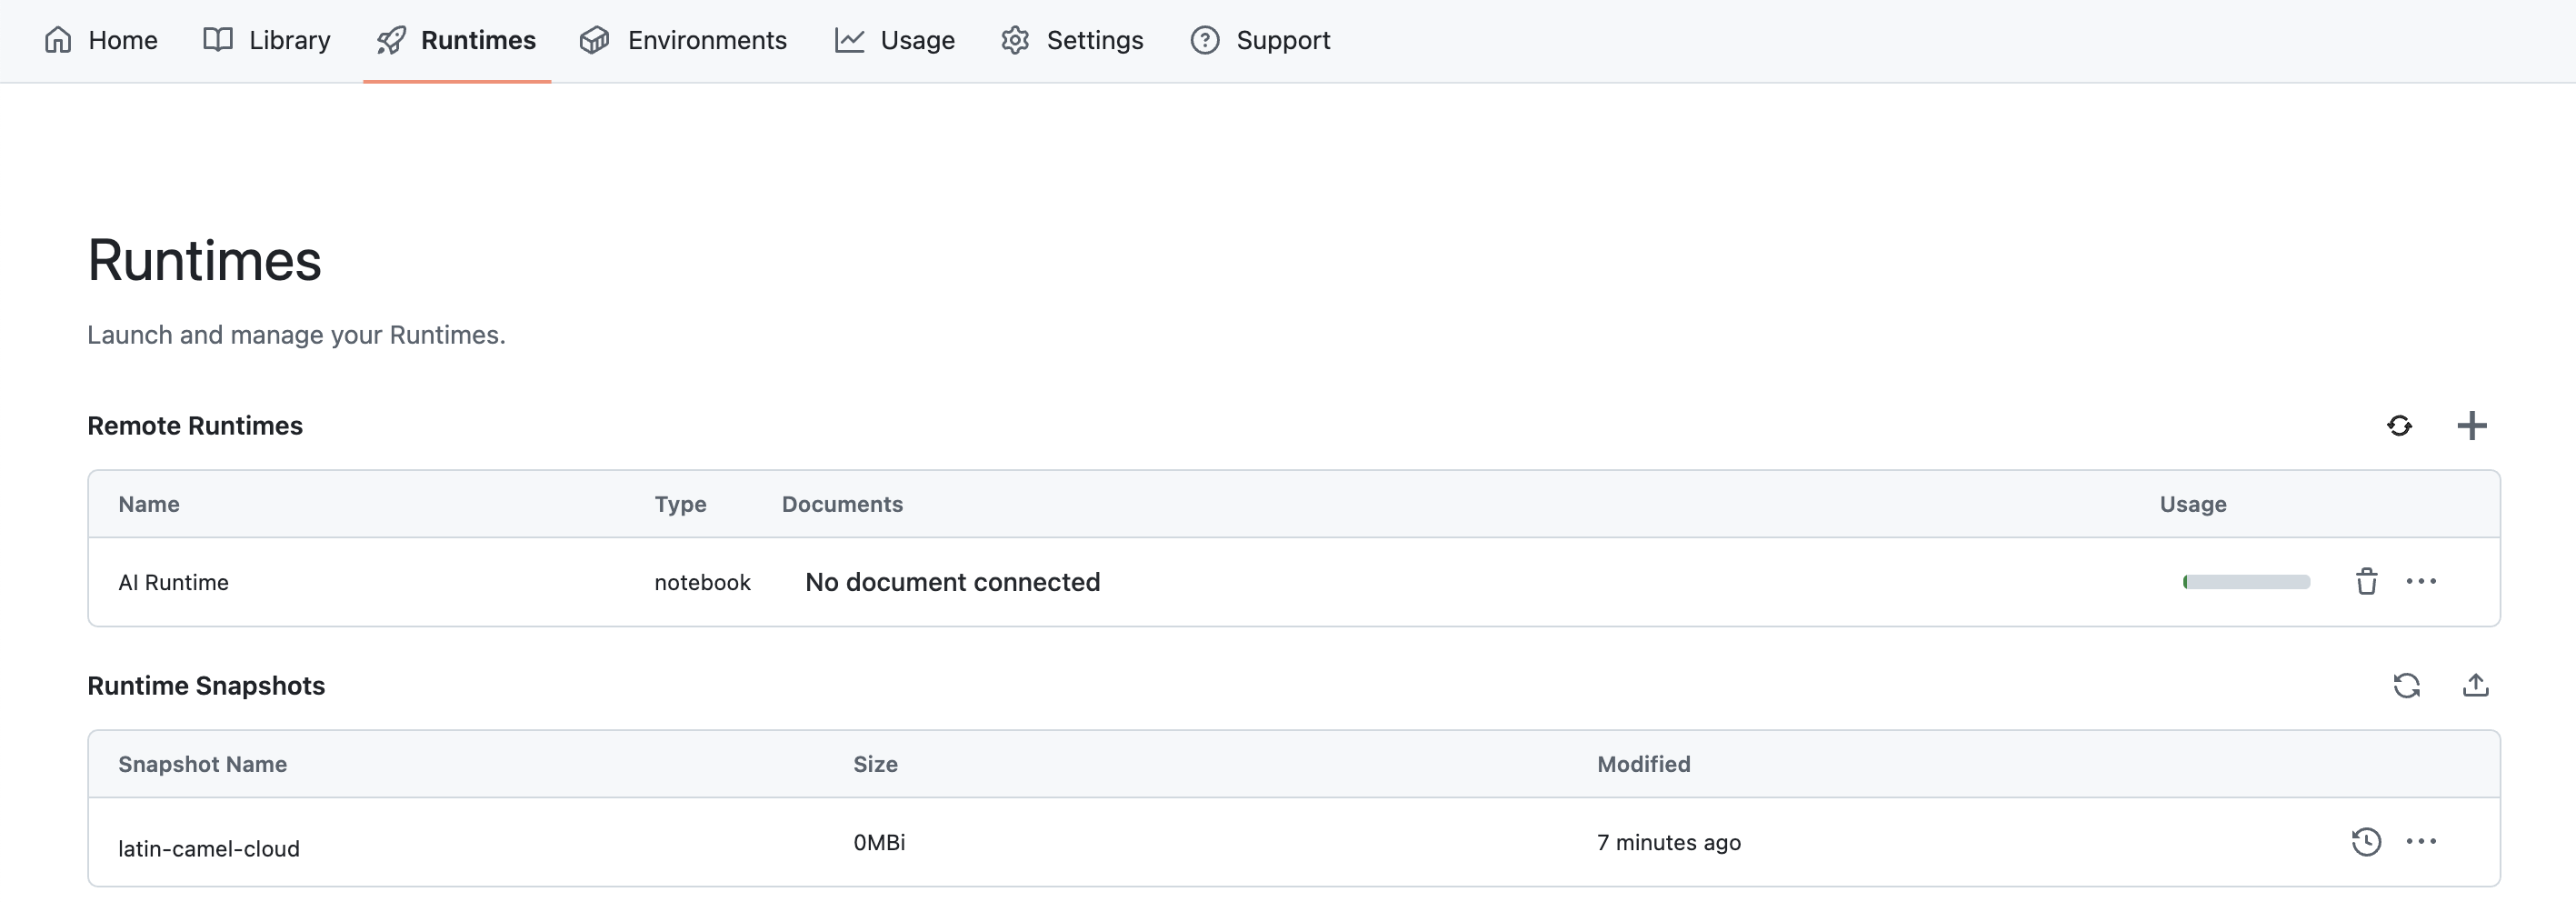
You can manage your Runtimes from the Runtimes tab.
Refer to the Runtimes feature documentation for more information.
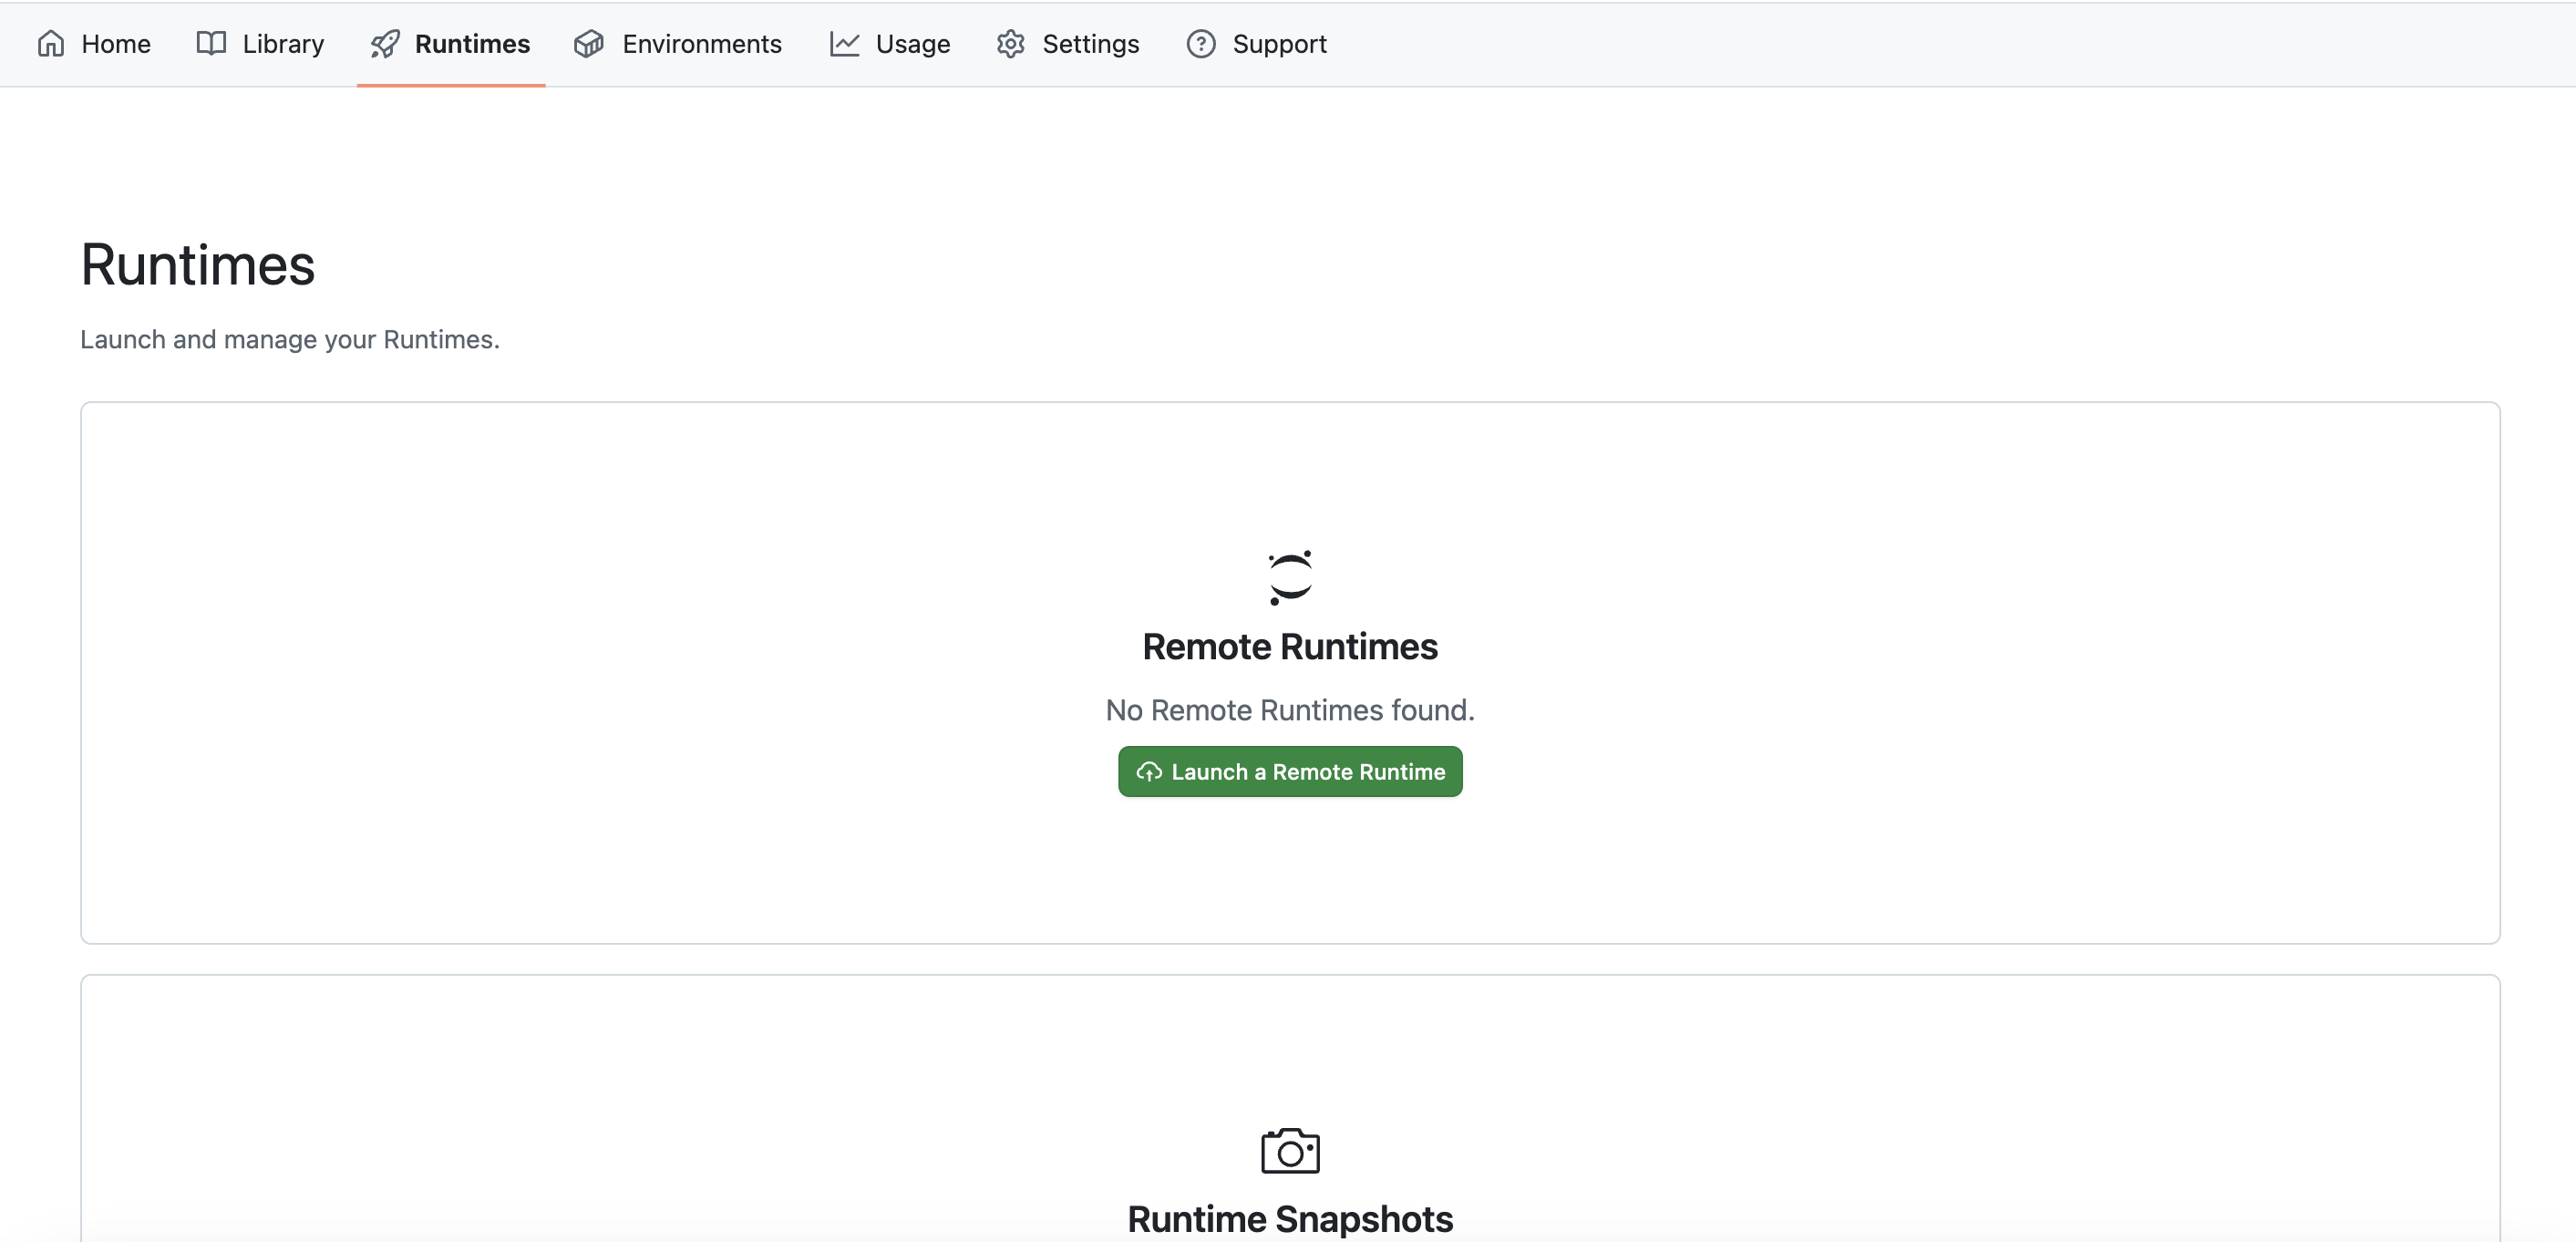
You can launch runtimes by clicking on the Launch a Remote Runtime button in the Runtimes tab.
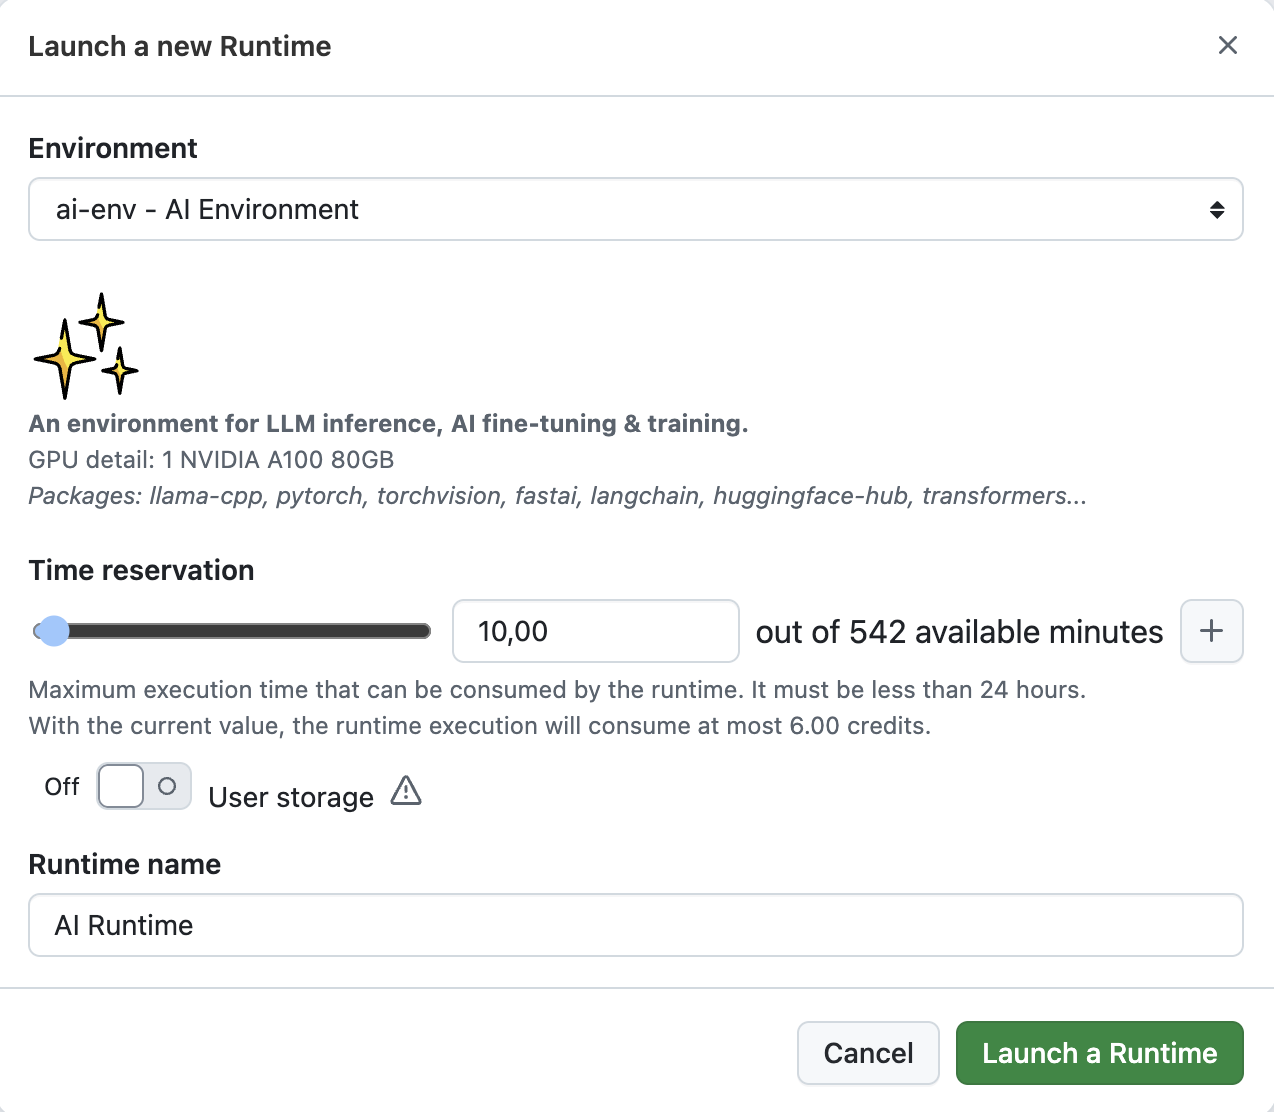
The following window will open.
Refer to the Launch a Runtime feature documentation for more information on the different options available.
You can assign a runtime to a Platform notebook by clicking on the Runtime Picker on the top of the Notebook editor. Refer to the Notebook Editor to create a notebook.
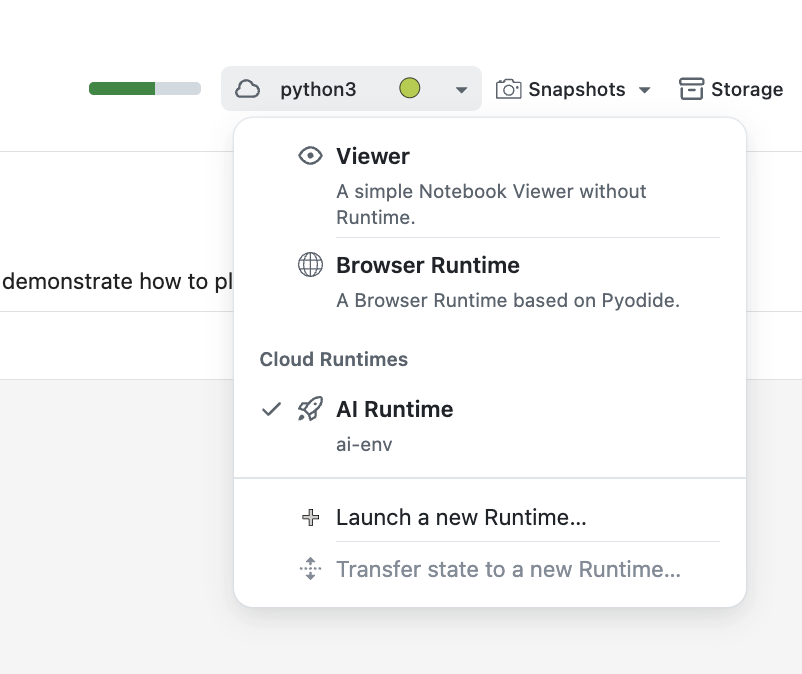
You can also launch a new Runtime directly from the Runtime Picker by clicking on the Launch a new Runtime.... You'll have the option to configure the Runtime settings, such as the Environment and the Time Reservation.
The Browser Runtime is a special runtime that runs in your browser. It is not a cloud Runtime and does not consume any credits.
Its computing power is limited and only has a few library installed but it is useful for small tasks and is efficient for credits consumption.
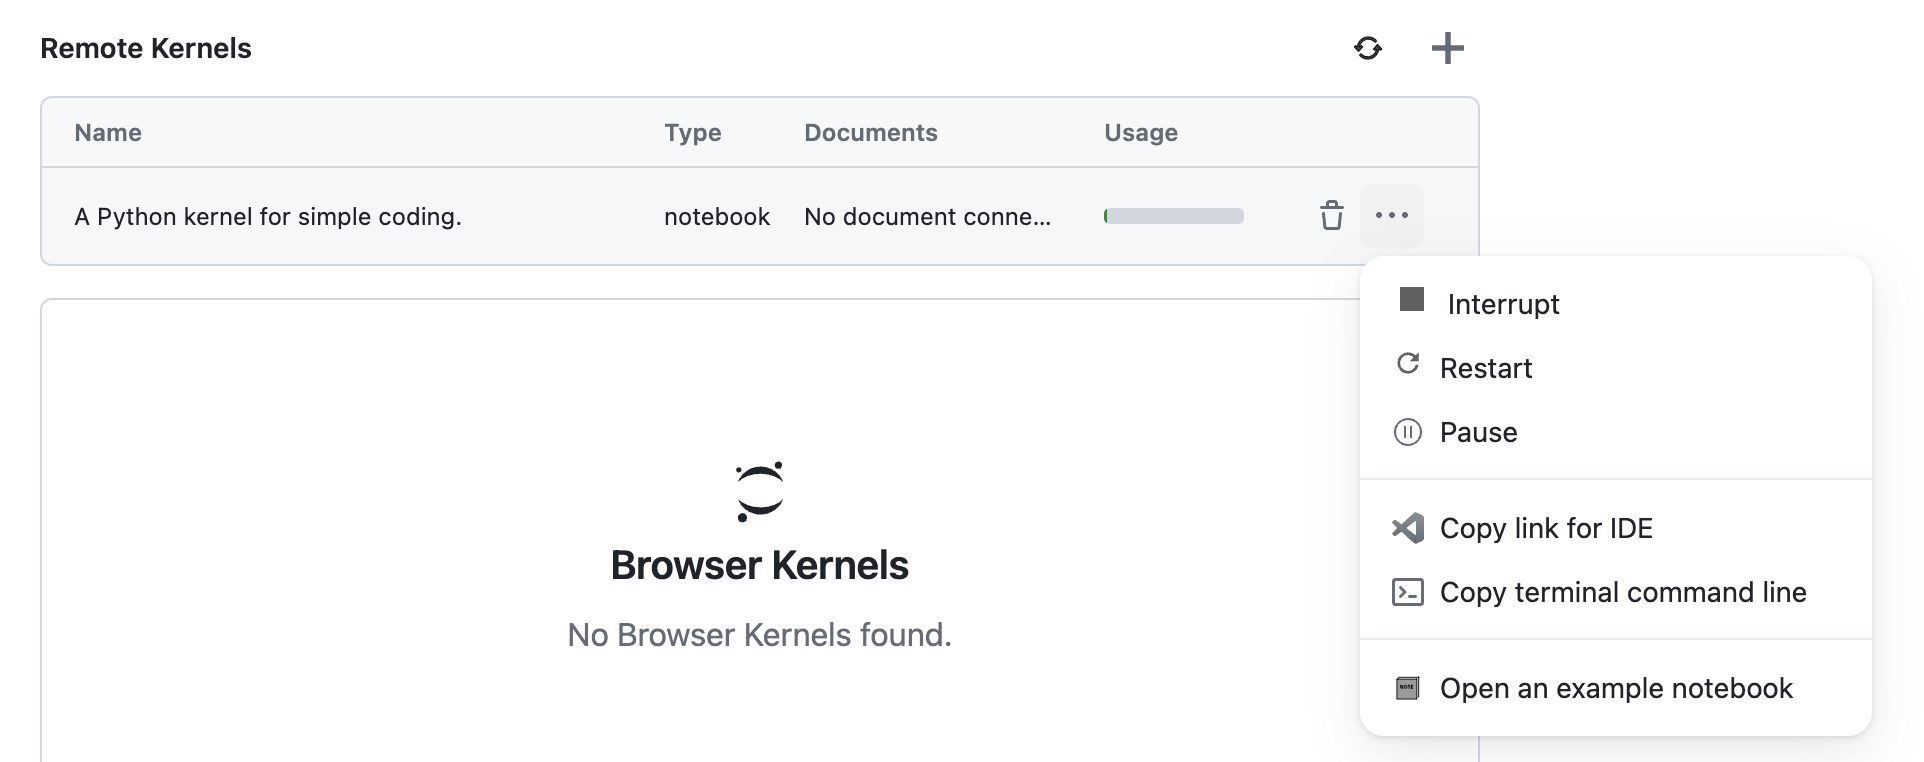
You can interrupt, restart and pause a runtime by clicking on the Interrupt, Restart or Pause button in the Runtime options.
Refer to the Interrupt a Runtime, Restart a Runtime and Pause a Runtime feature documentation for more information.
You can resume a runtime by clicking on the Resume button in the Runtime Snapshot options.
Refer to the Resume a Runtime feature documentation for more information.

When changing the Runtime of a Notebook from a Browser Runtime to a new Runtime, you can transfer the state, i.e. the already defined variables, to the new Runtime.
Refer to the Transfer a Runtime State feature documentation for more information.
If you want to transfer the state, you can click on the Transfer state to a new Runtime... button in the Runtime Picker.
All the variables will be transferred to the new Runtime.
You can terminate a runtime by clicking on the trash icon. Refer to the Terminate a Runtime feature documentation for more information.

Runtimes Snapshots
You can manage your Runtimes Snapshots from the Runtimes tab.
Refer to the Runtimes Snapshots feature documentation for more information.
In the Notebook Editor, you can take snapshots by clicking on the Snapshots button on top of the Notebook editor.
Refer to the Take a Runtime Snapshot feature documentation for more information.

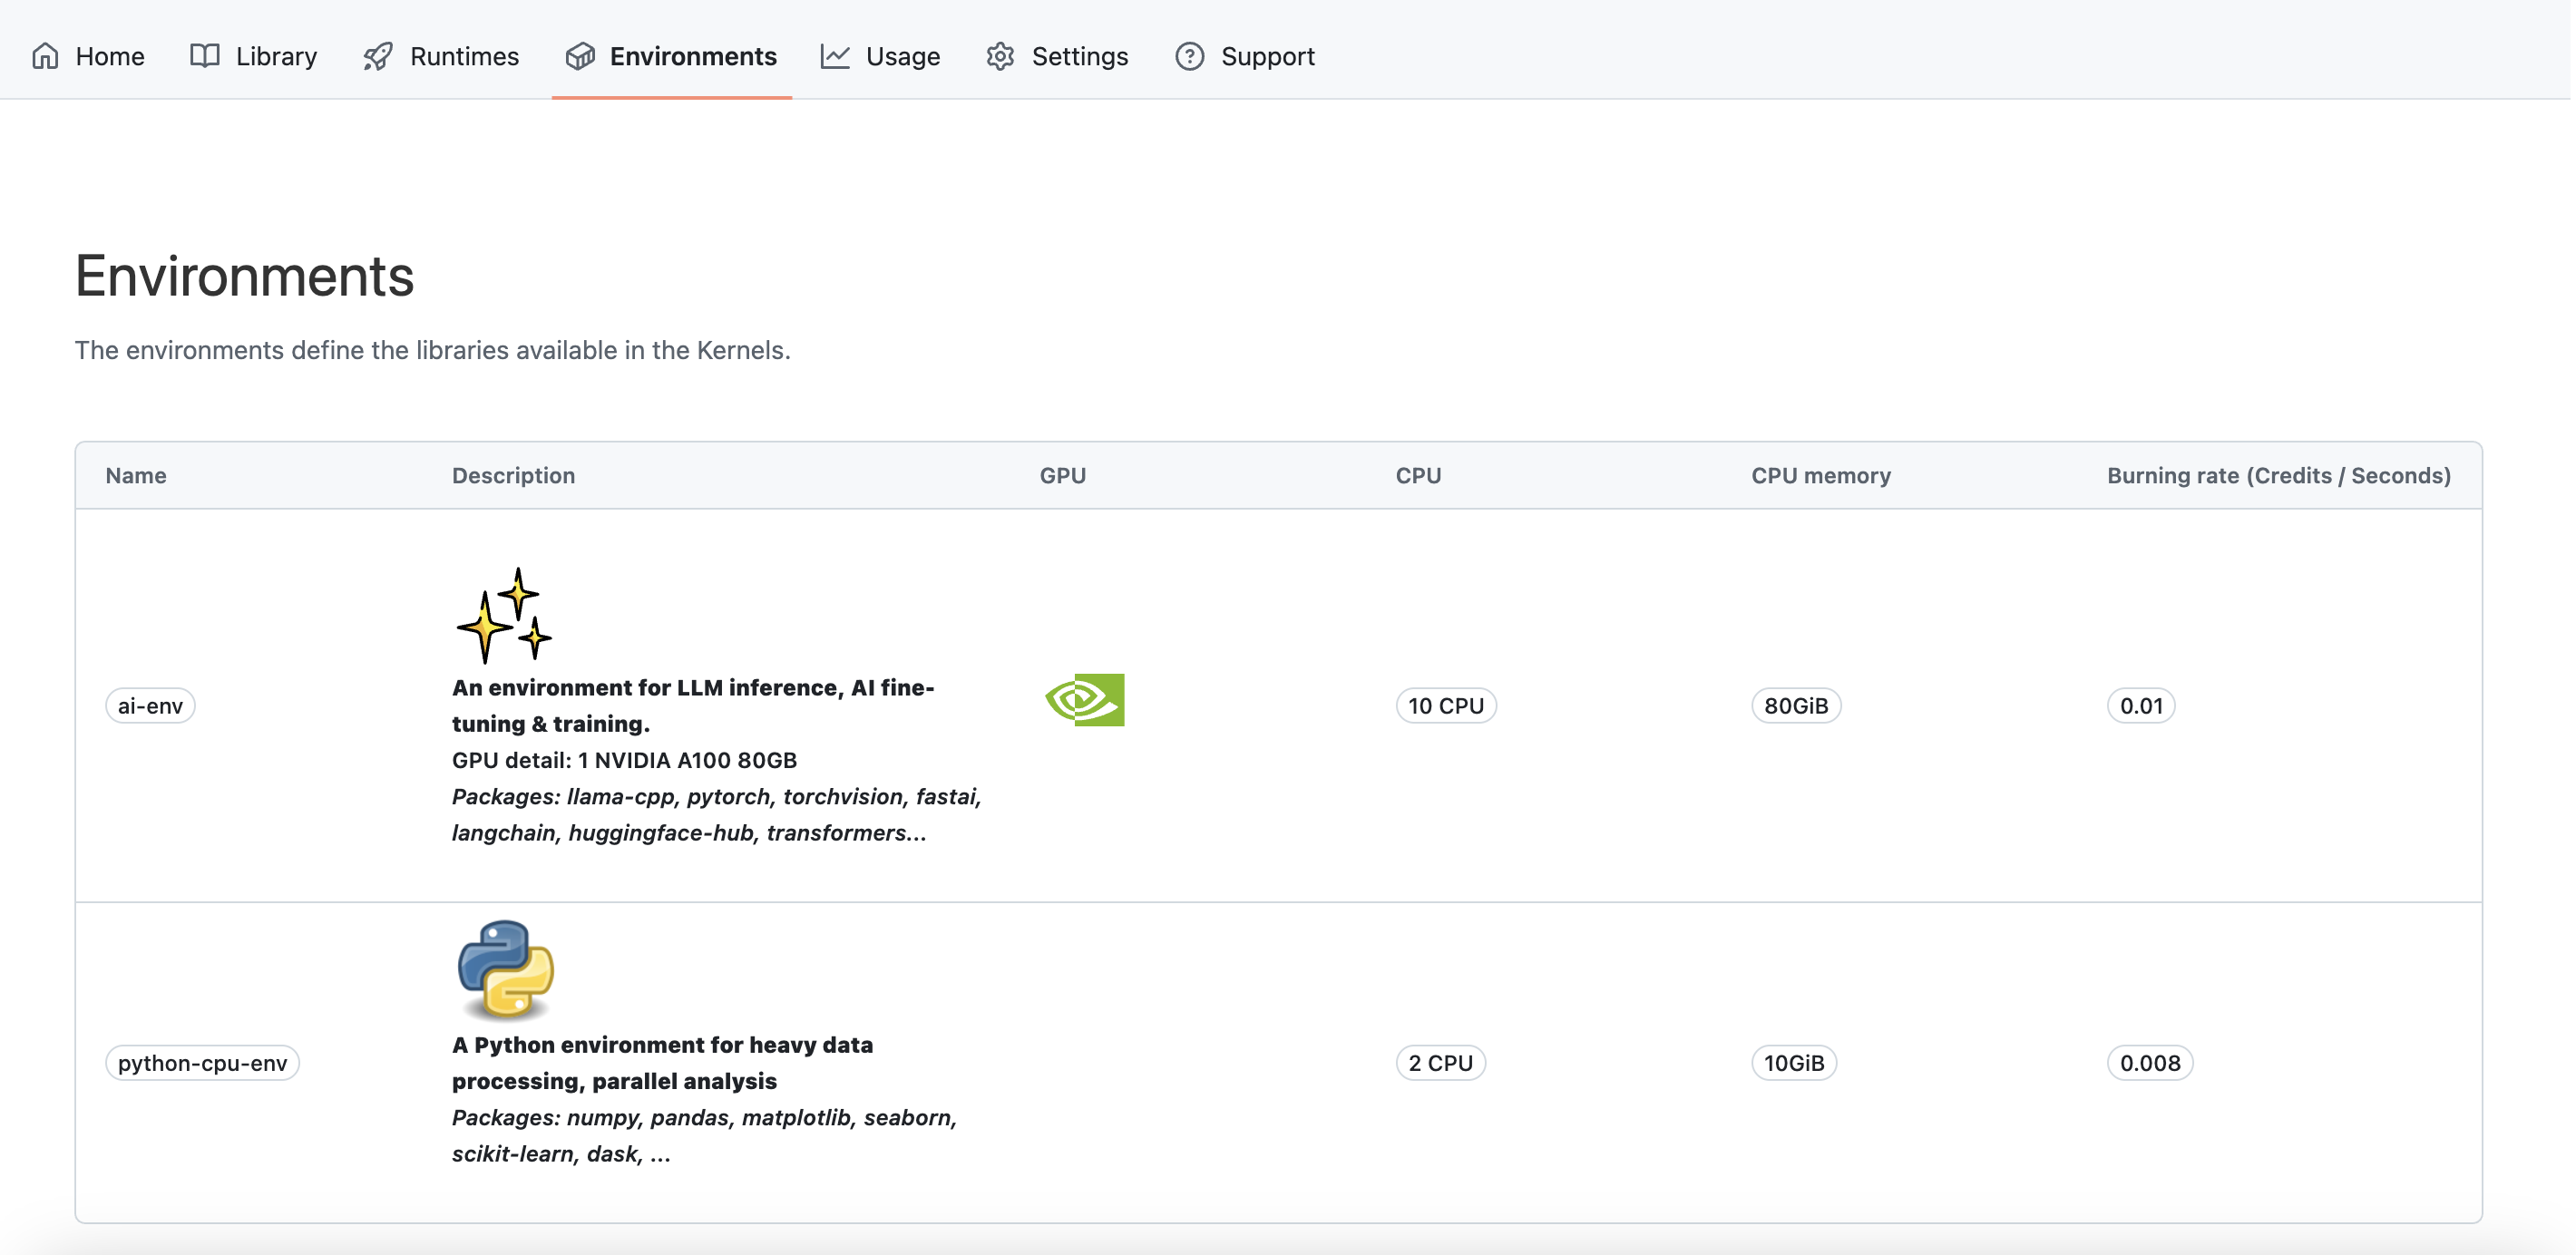
Environments
You can view the available environments in the Environments tab.
Refer to the Environments feature documentation for more information.
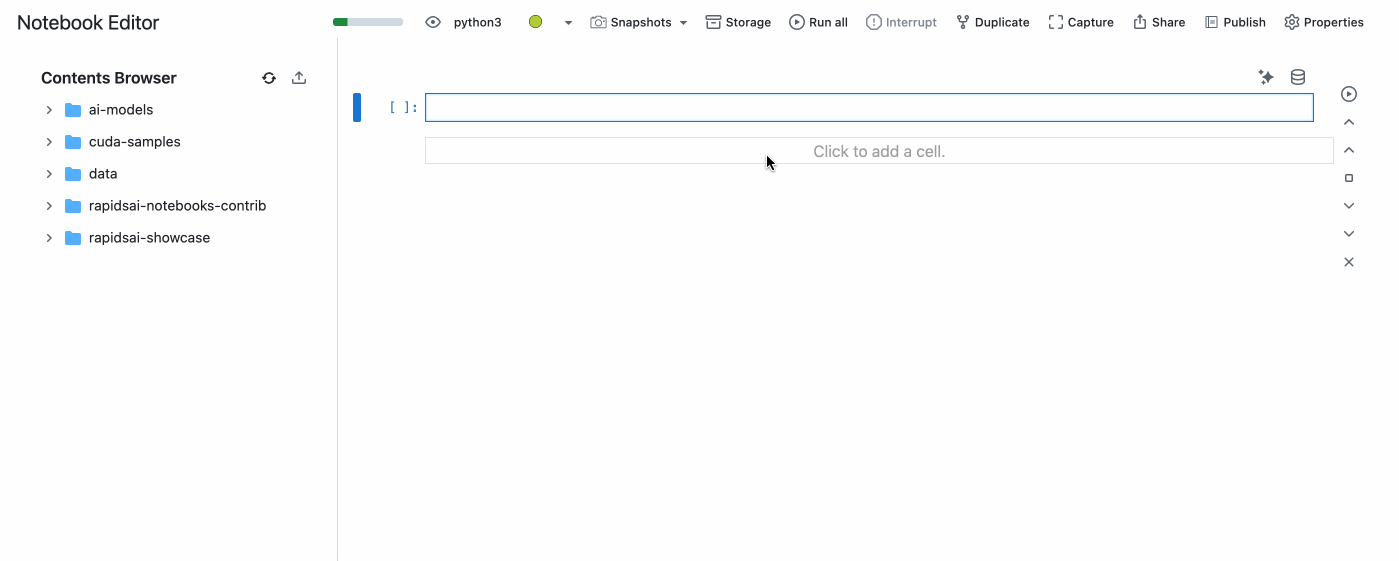
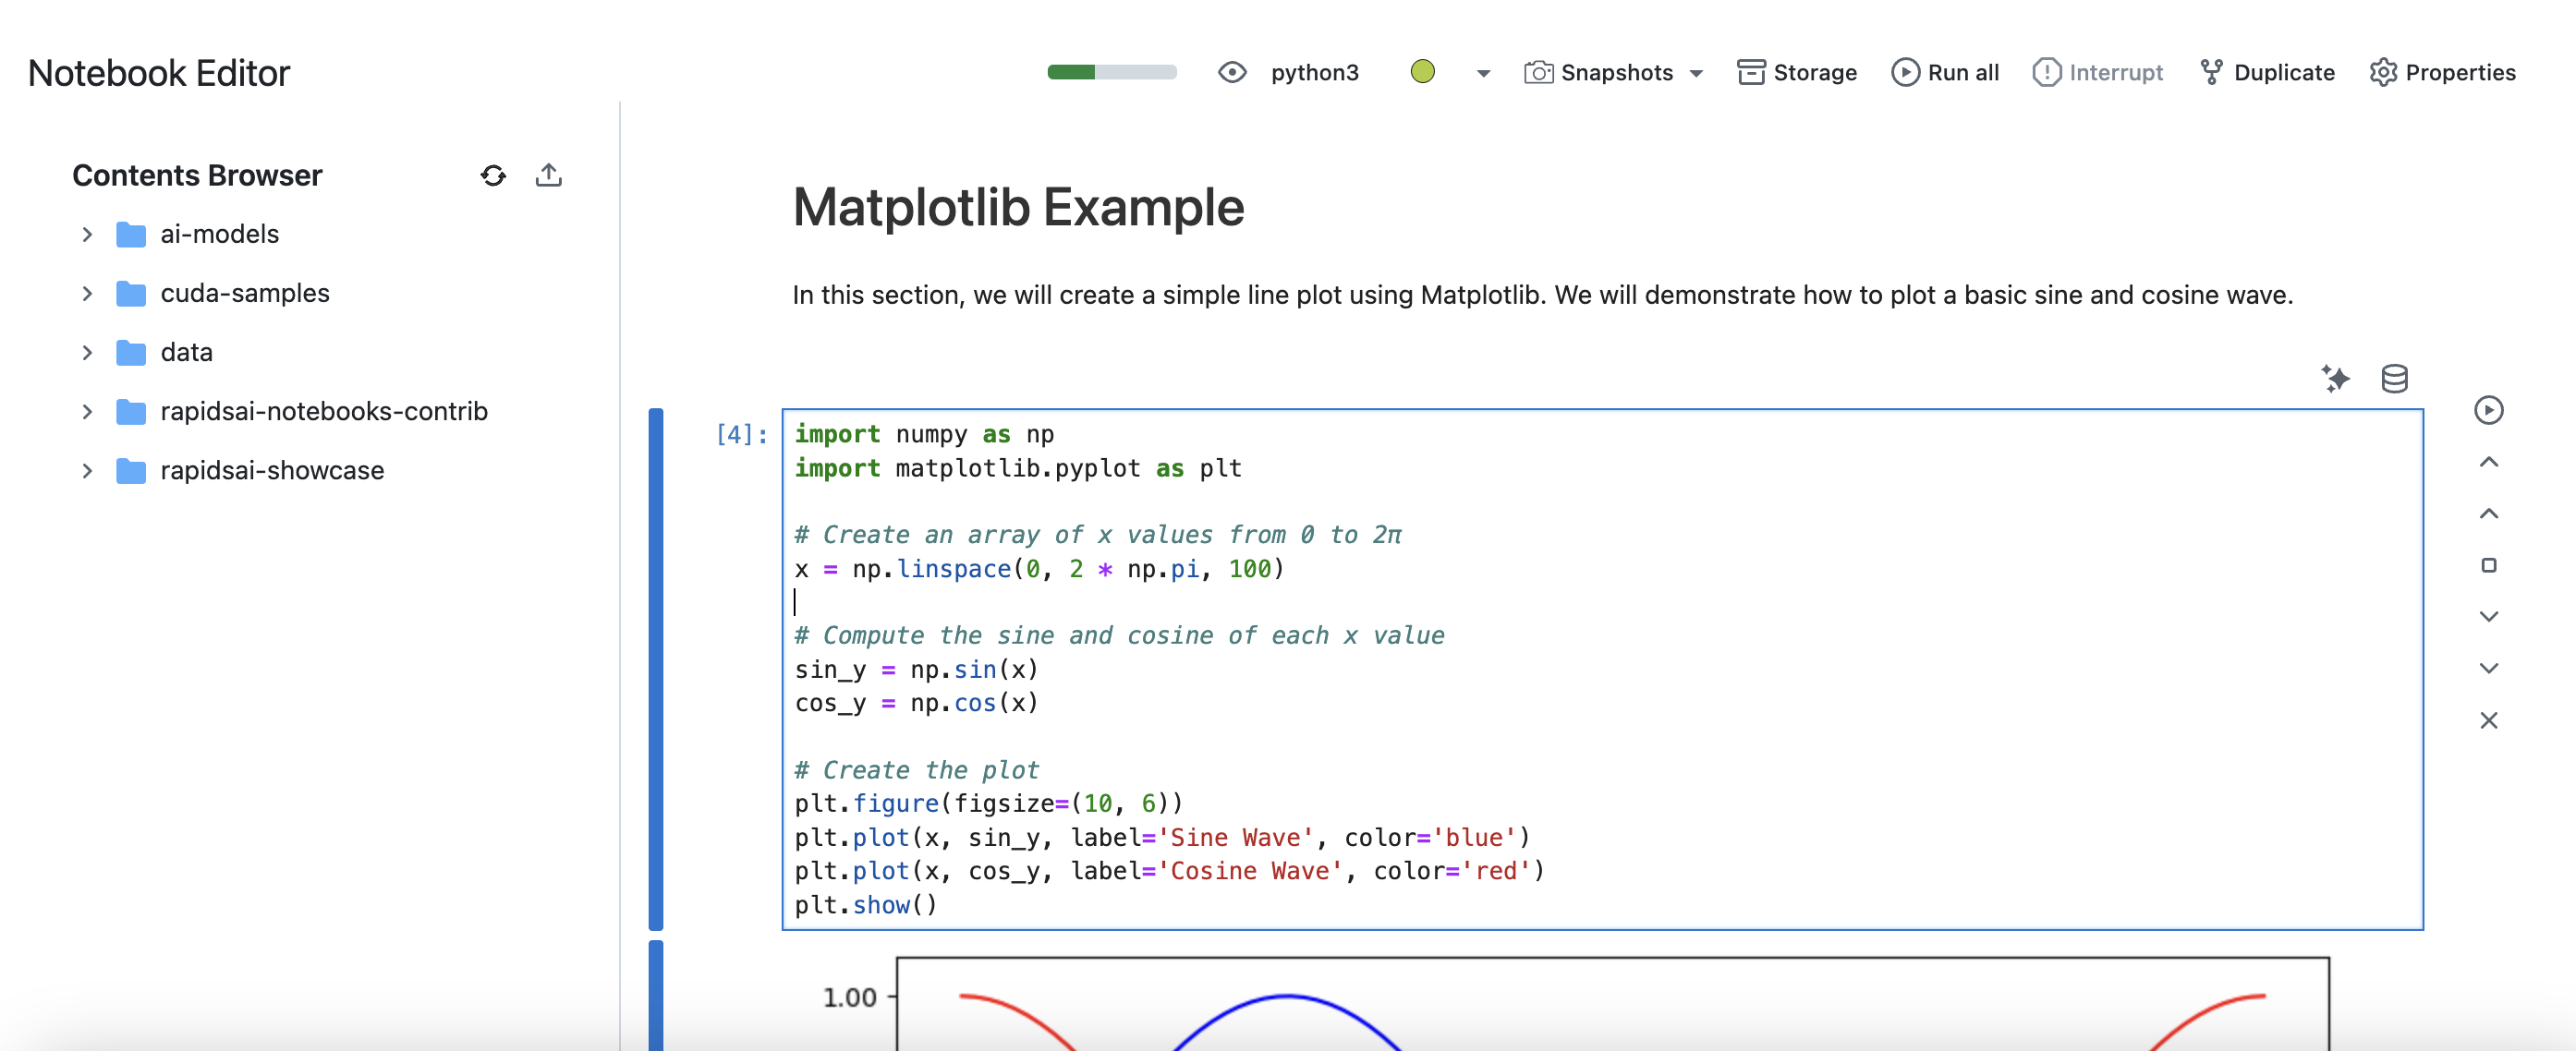
Notebook Editor
You can use the Notebook editor in the Datalayer Platform to create and edit Notebooks. Refer to the Notebook Editor feature documentation for more information.
Go the the Library tab and click on ➕ icon to create a new Notebook.
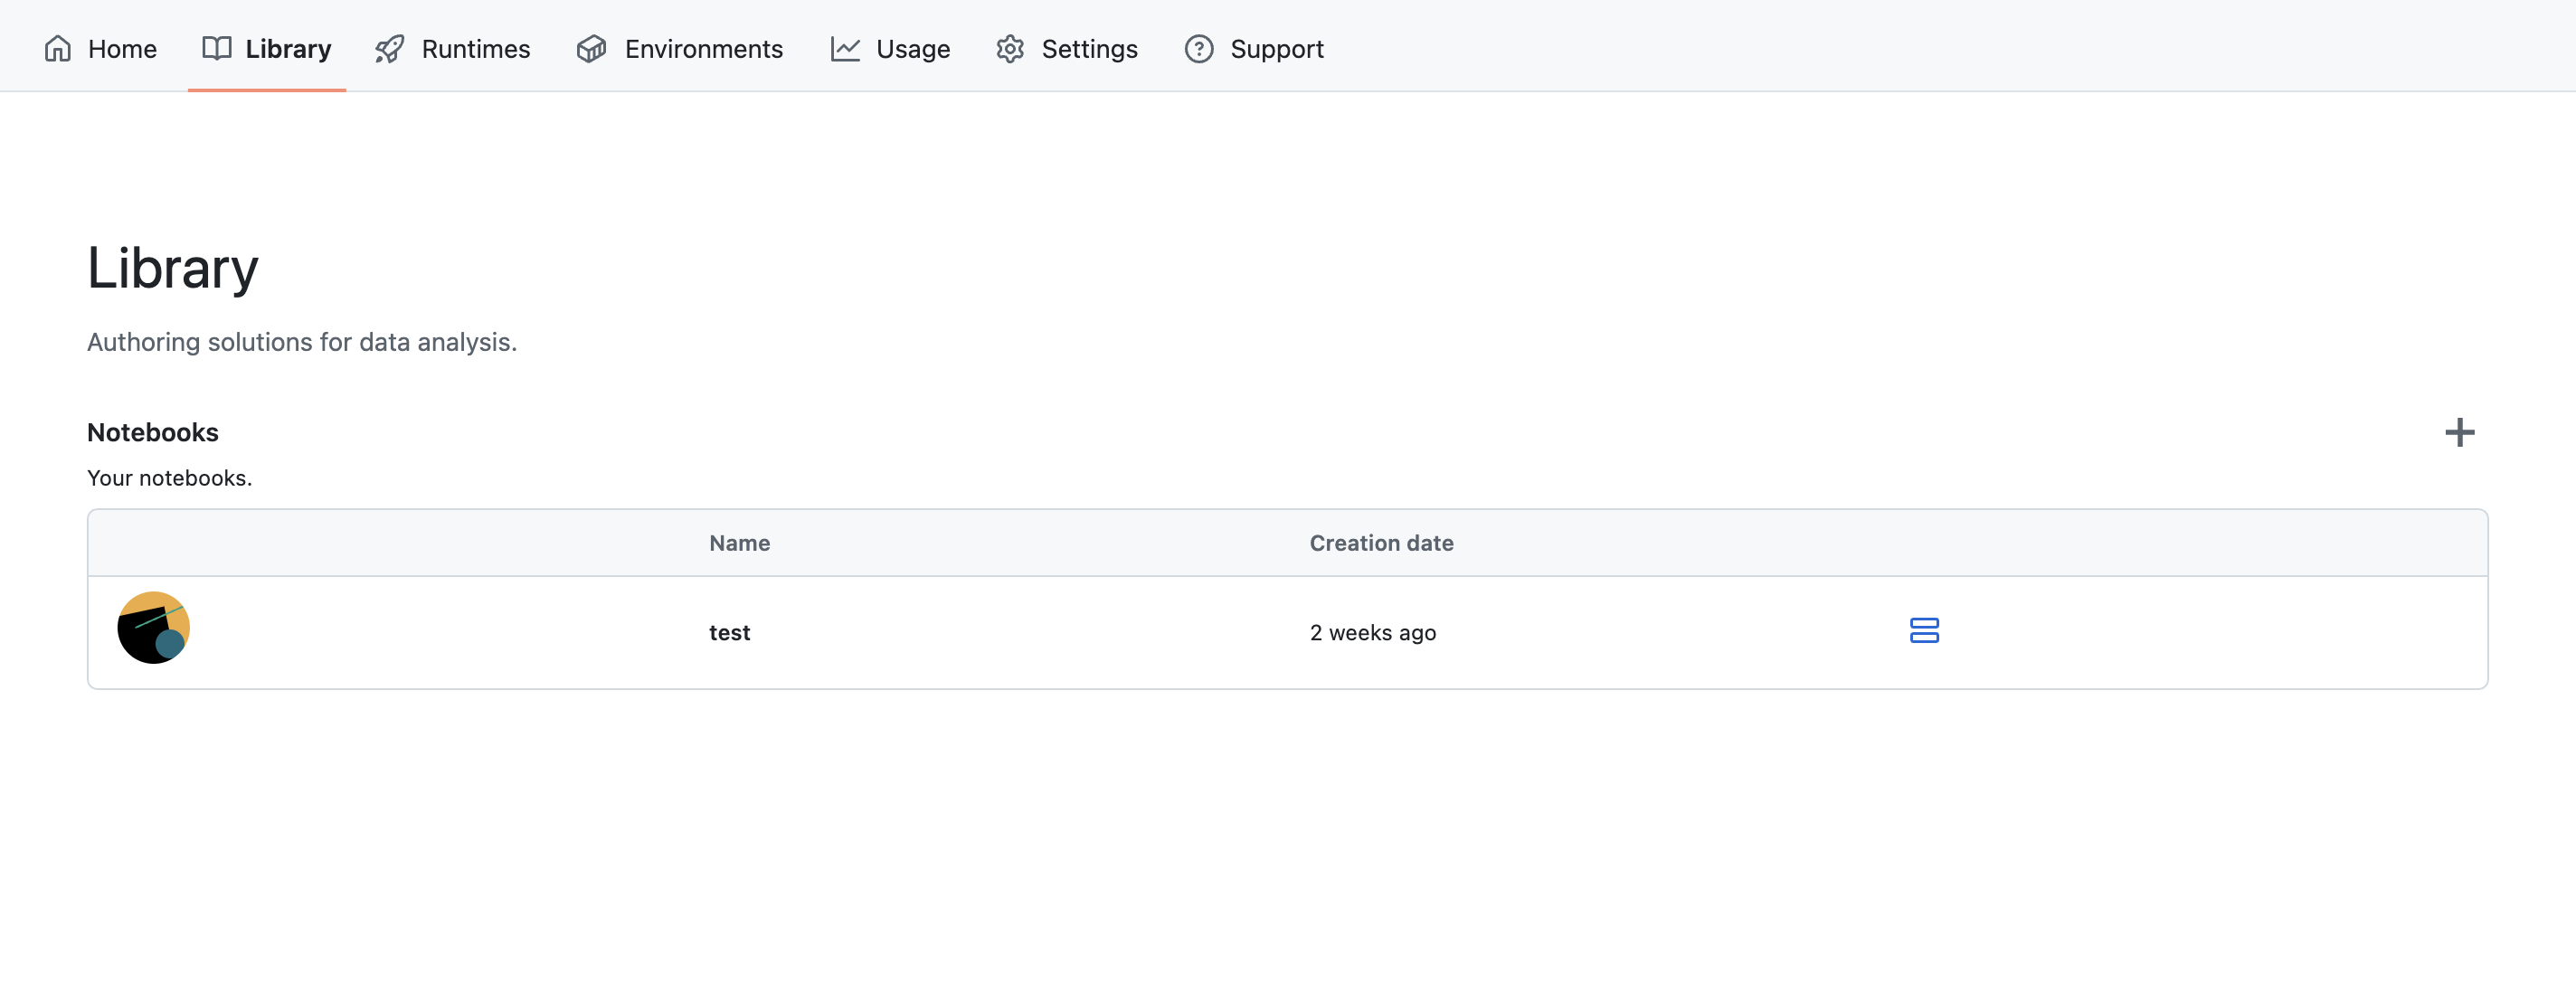
You will need to give it a name and a description. You can also upload a .ipynb file if you want to import an existing Notebook.
Then, you can select the Runtime you want to use to run the Notebook. Refer to the Platform Runtimes documentation for more information.
All the traditional JupyterLab functionalities and shortcuts are available in the Notebook editor. On top of that, you can use Datalayer features such as the AI Agents, the Runtimes Snapshots, the Data Sources and more.
- When opening a notebook, it will initially be in viewer mode. Assigning a
Runtimeto the notebook will enable editing capabilities. - Once a
Runtimeis assigned, the notebook will automatically save your changes in real-time, ensuring no progress is lost. - You can download the notebook as a
.ipynbfile by clicking on thePropertiesbutton in the top right corner of the editor and selecting theDownloadoption. This allows you to save your work locally for offline access or sharing.
AI Agents
You can use the AI Agent in the Notebook Editor to enhance your productivity. Refer to the AI Agents feature documentation for more information.
The AI Agents do not currently consume credits! You can use and experience them for free 🎉
Click on the ✨ icon on the top right corner of a cell to open the AI Agent panel. Type your request in the input box and click on the Ask AI button to execute the request.
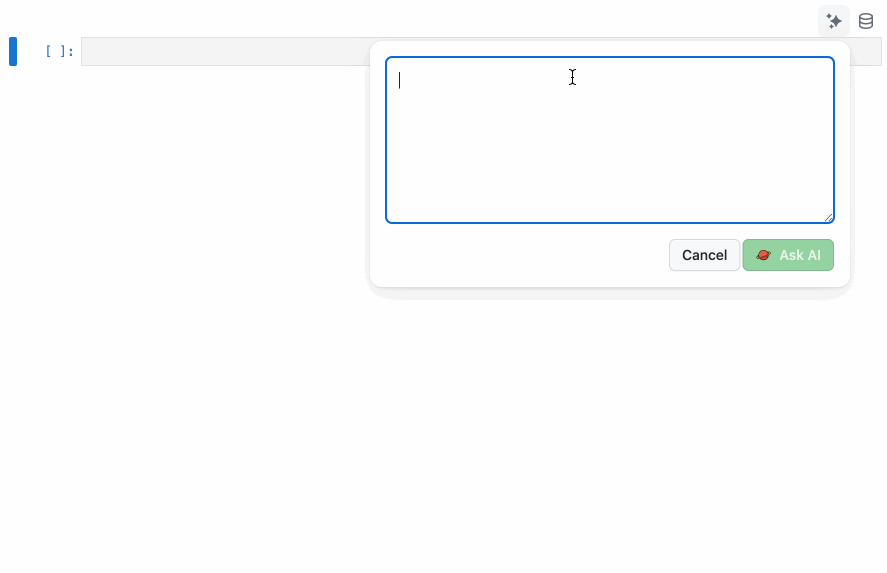
The AI model behind the AI Agent is gpt-4o mini from Azure OpenAI.
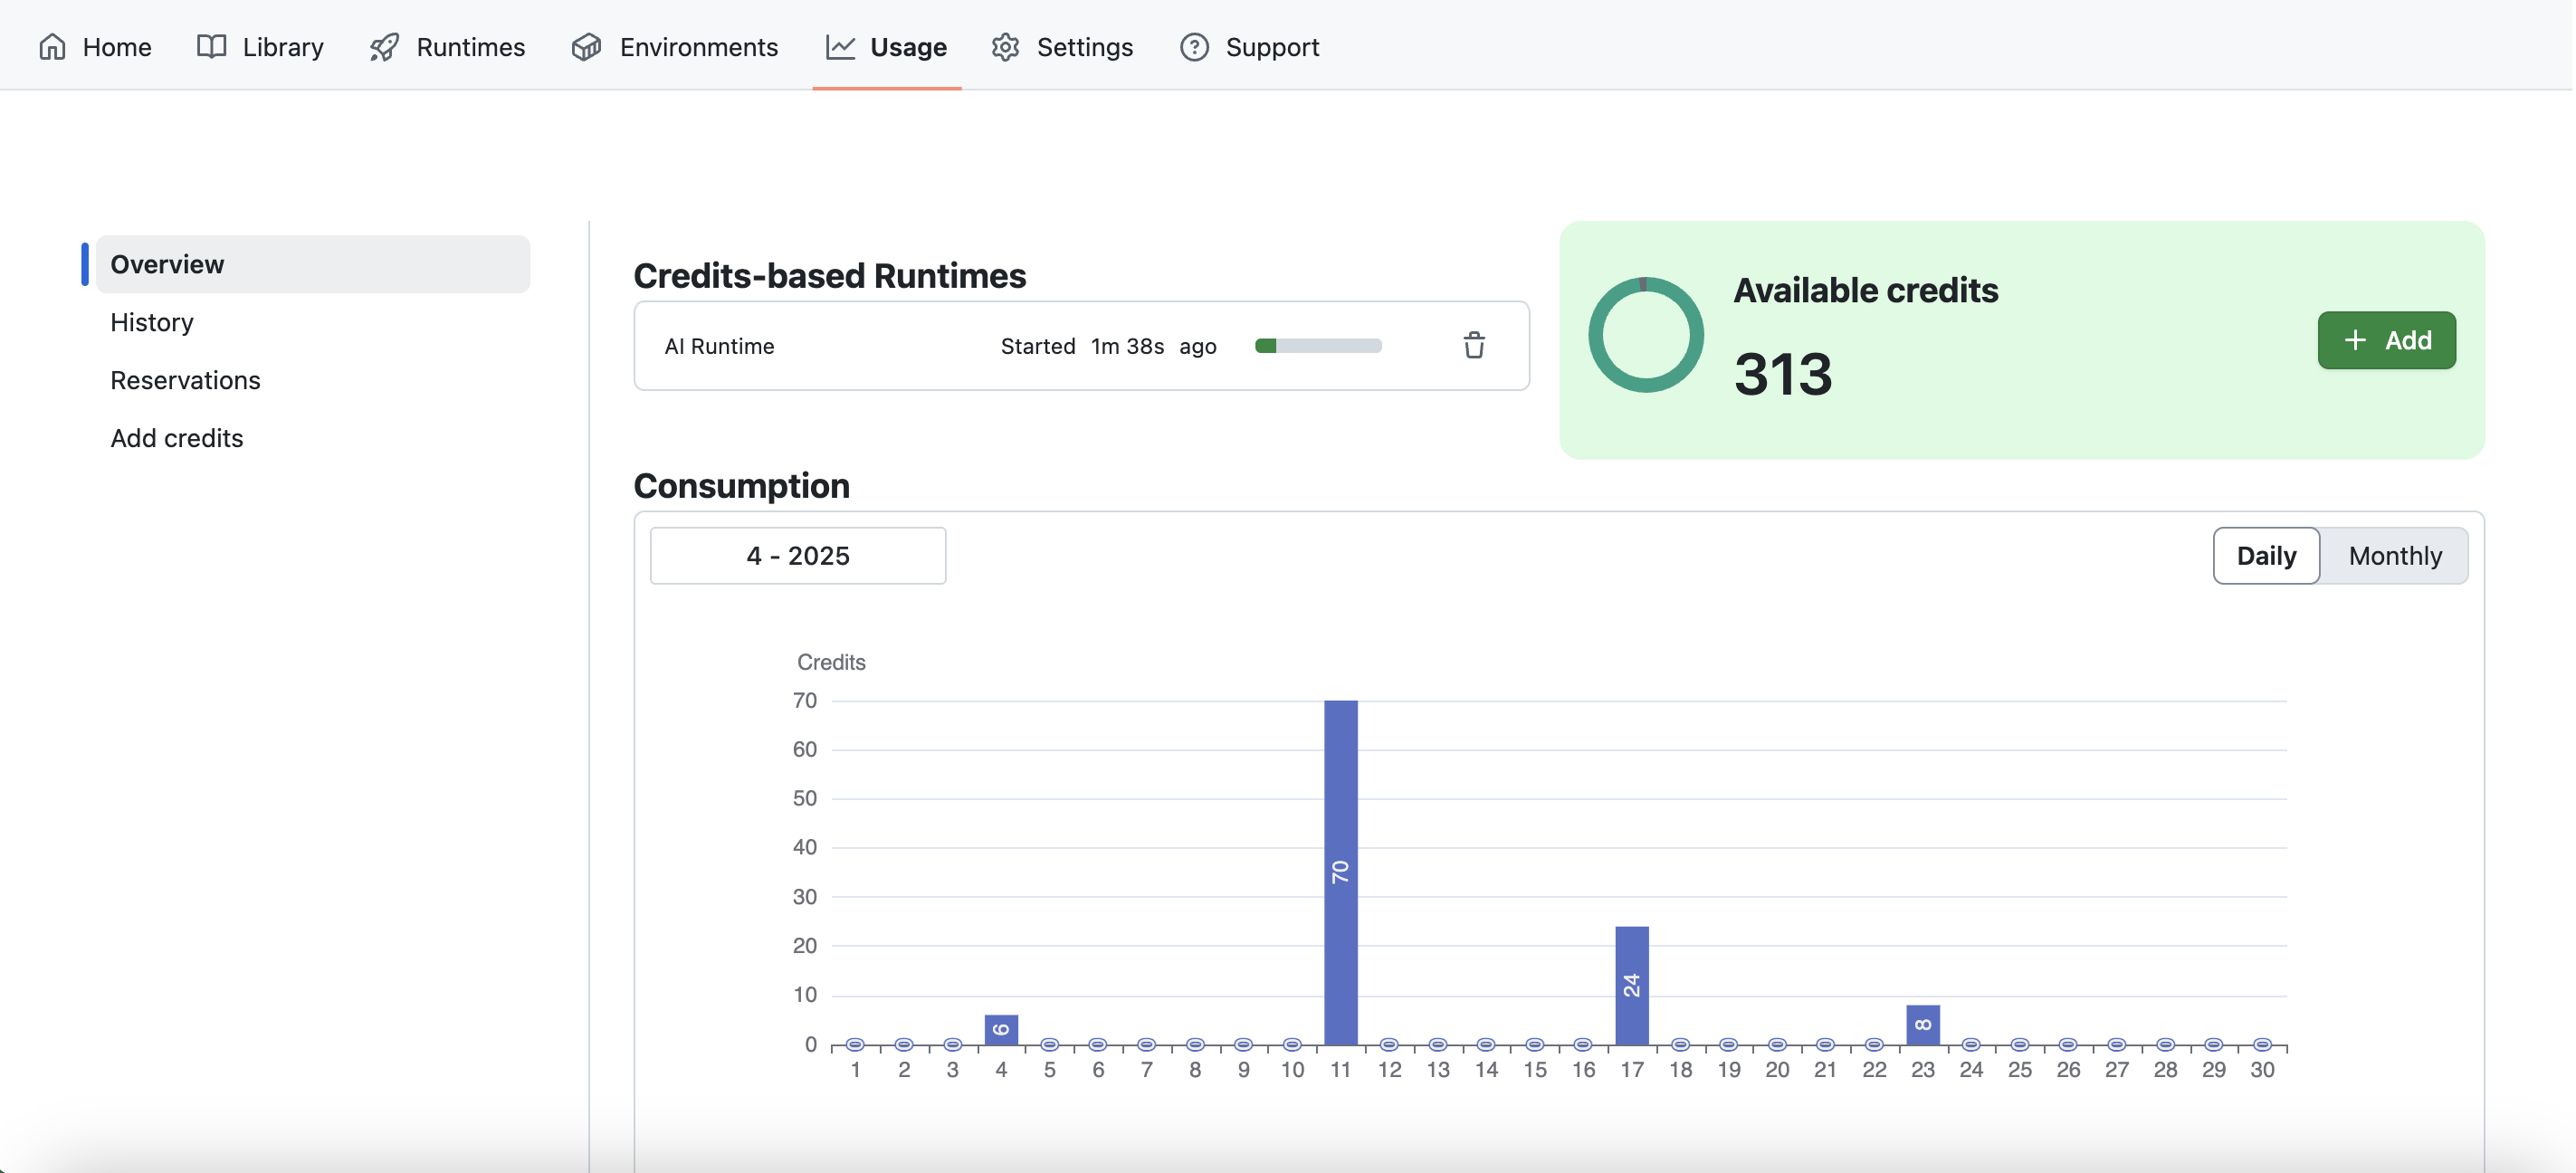
Credits
You can view your consumption of credits and buy credits in the Usage tab.
Refer to the Credits feature documentation for more information.
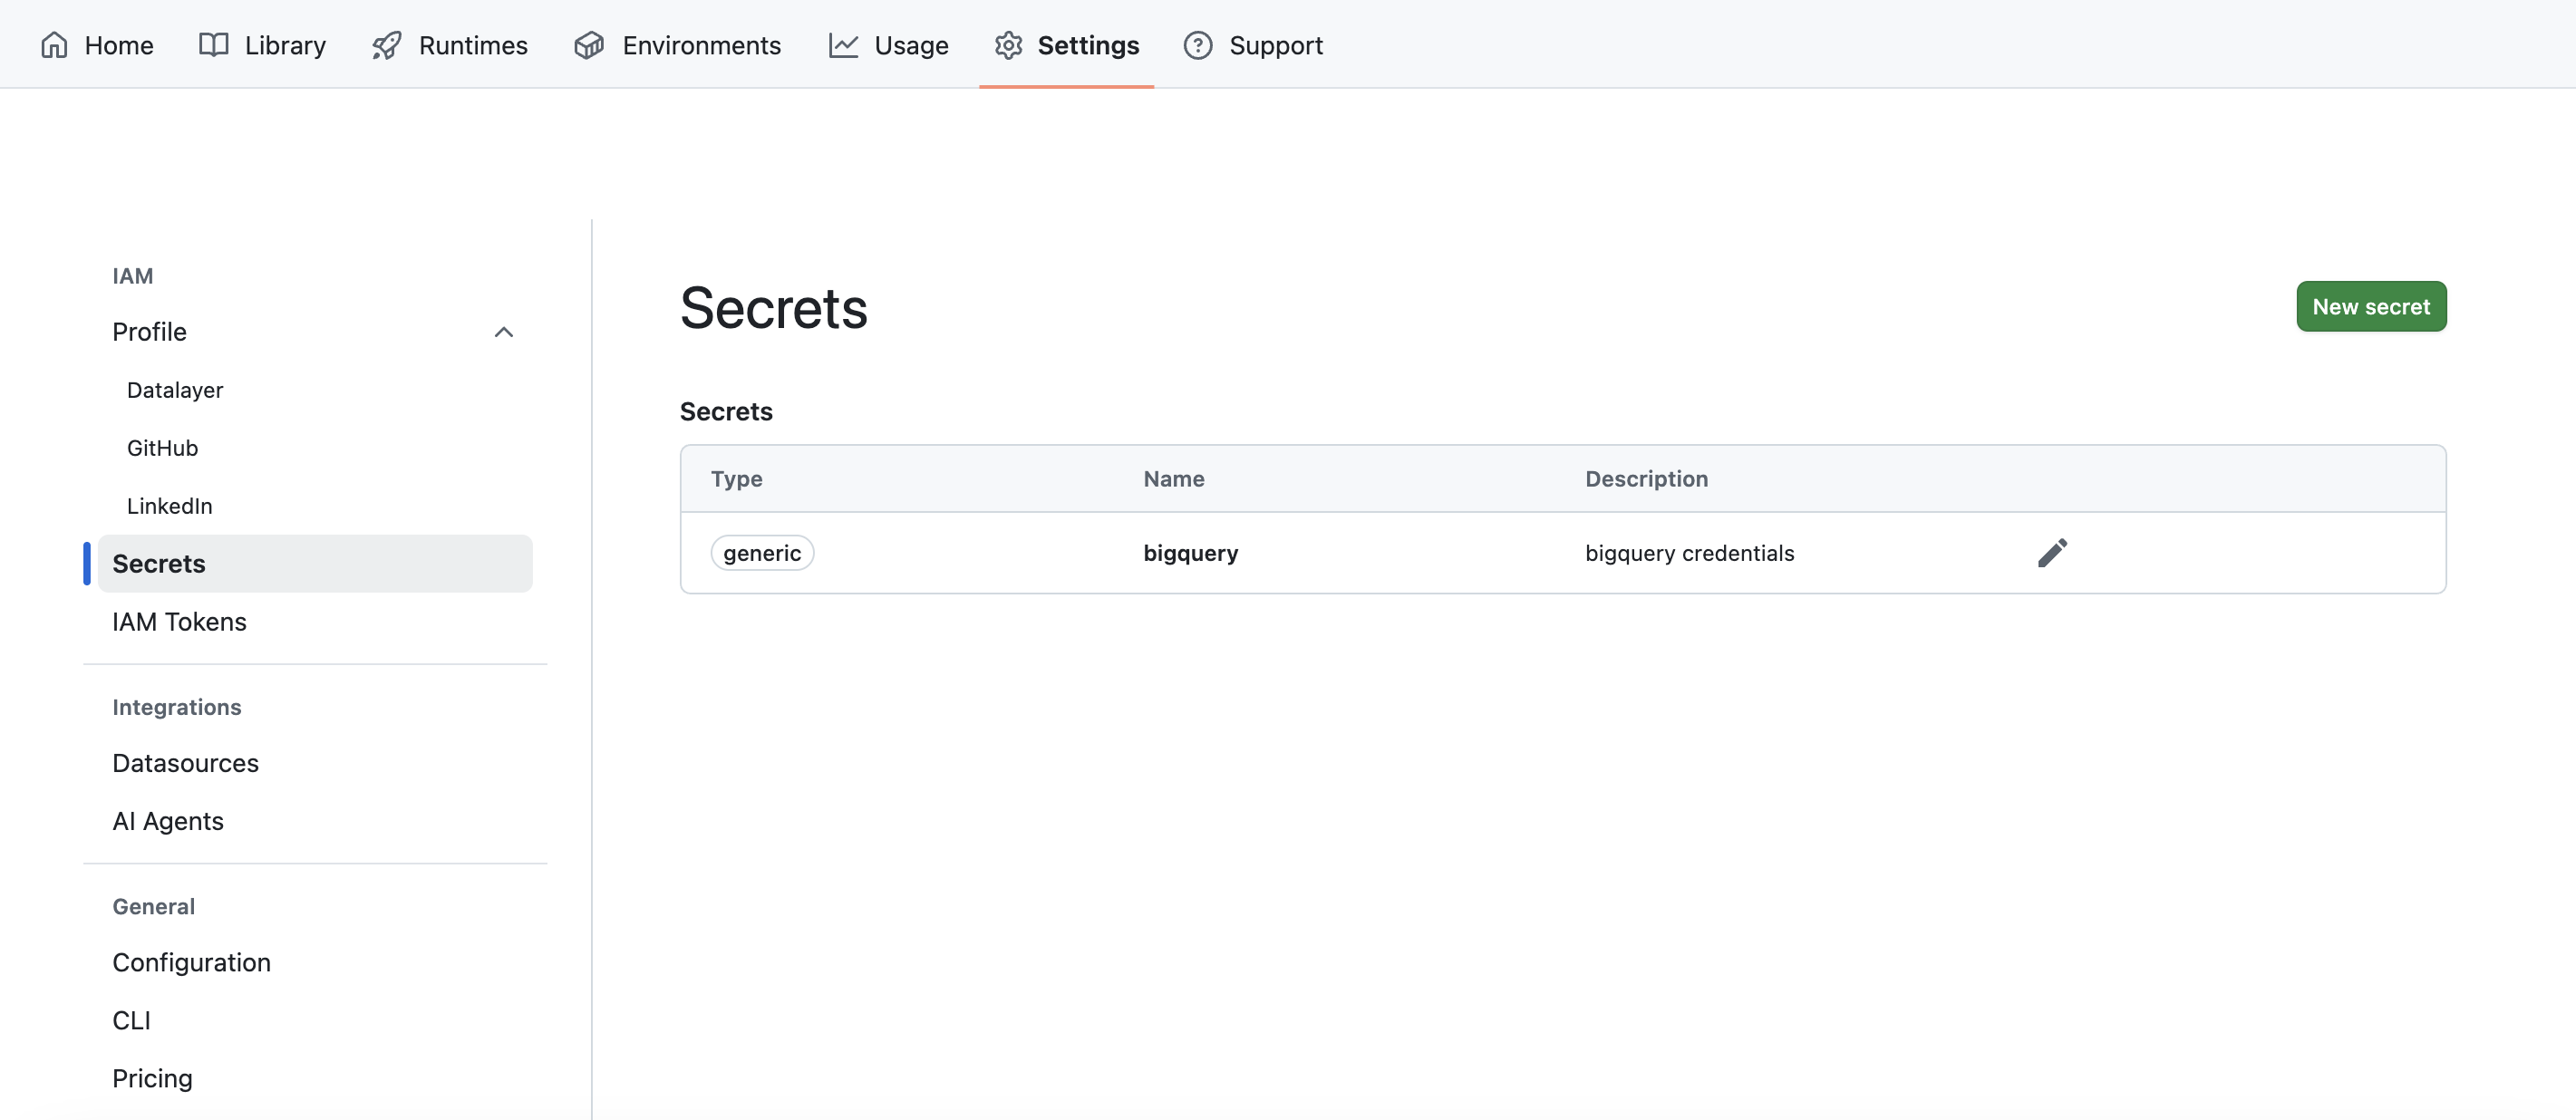
Secrets
You can manage your secrets in the Secrets under the Settings tab.
Refer to the Secrets feature documentation for more information.
Data Sources
You can connect to SQL Database and use SQL queries in the Notebook Editor. Refer to the Data Sources feature documentation for more information.
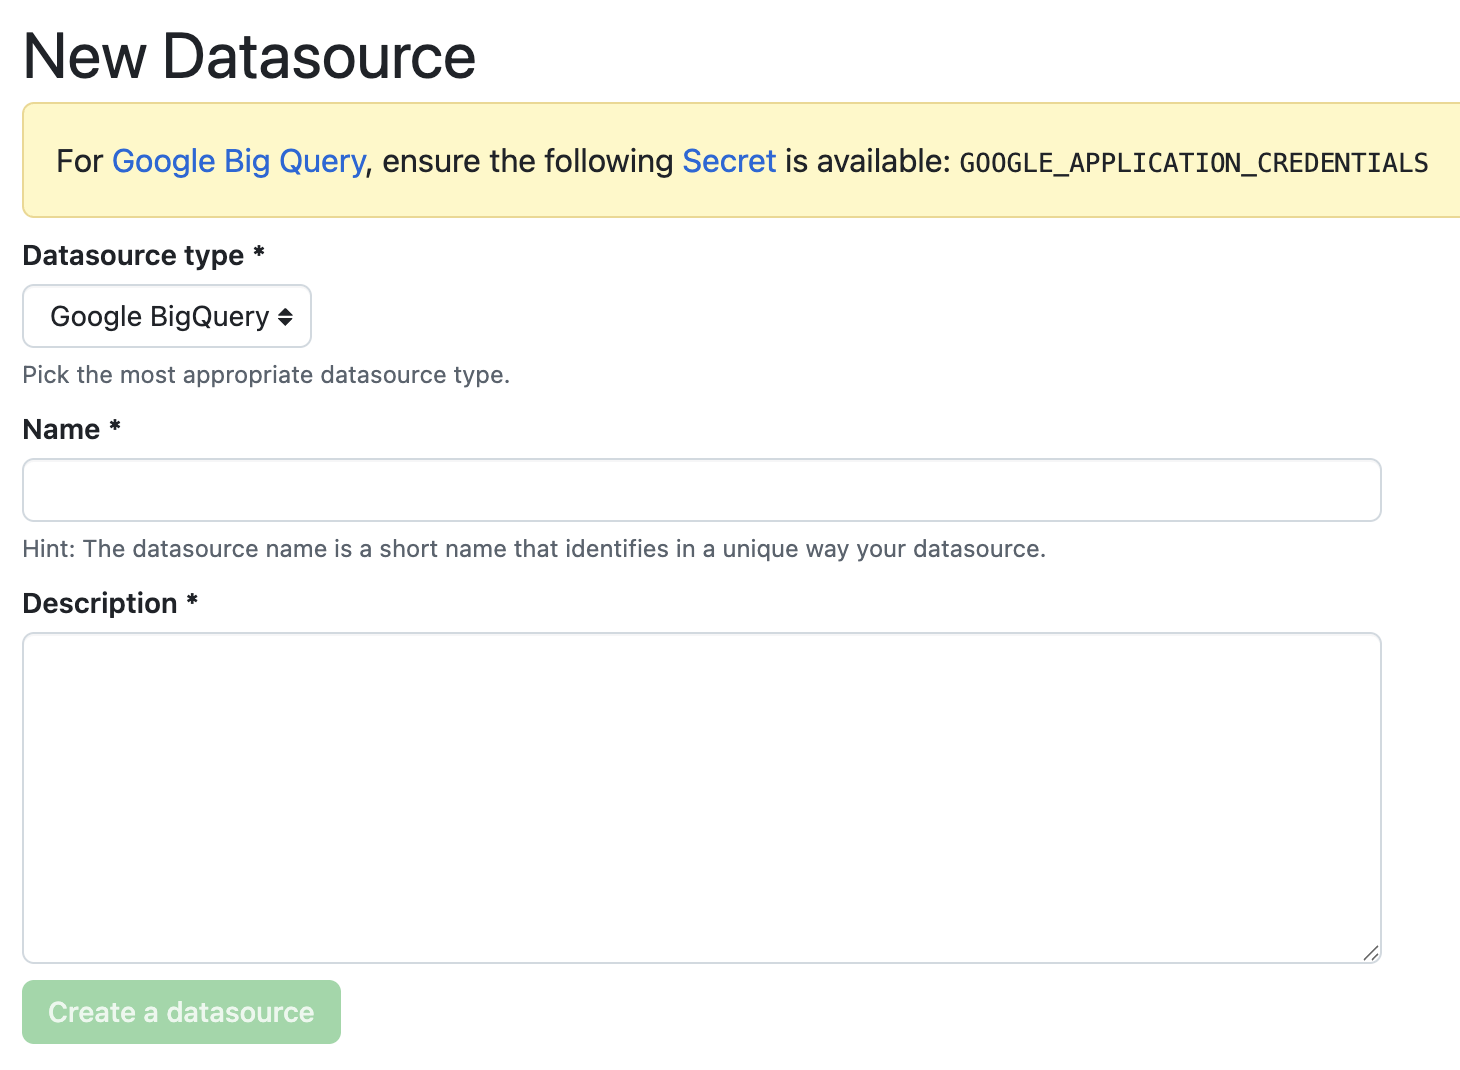
To create a new Data Source, go to the settings tab and click on the Data Sources section.
Then, click on New Data Source and select the type of Data Source you want to create.
As mentioned on the page, you will need to create Secrets with specific names depending on the type of Data Source you want to create.
You can the use the created Data Source in the Notebook Editor by clicking on the database icon on the top right of a cell.
Then, select the Data Source you want to use and type your SQL query in cell. A PyGWalker output will be displayed and you can easily visualize the data.
The results of the SQL query will stored in a Pandas DataFrame named df that you can use in the notebook for further analysis.